

How to set up a Flutter project from an existing Github repo using Android Studio


So, you've found this Flutter app on Github that you'd like to run locally on your machine. In this guide, I'll show you how to do this step by step.
Download the Github repo
First, download the github repo. This can be done either through:
git clone https://github.com/ConProgramming/flutter-example.git
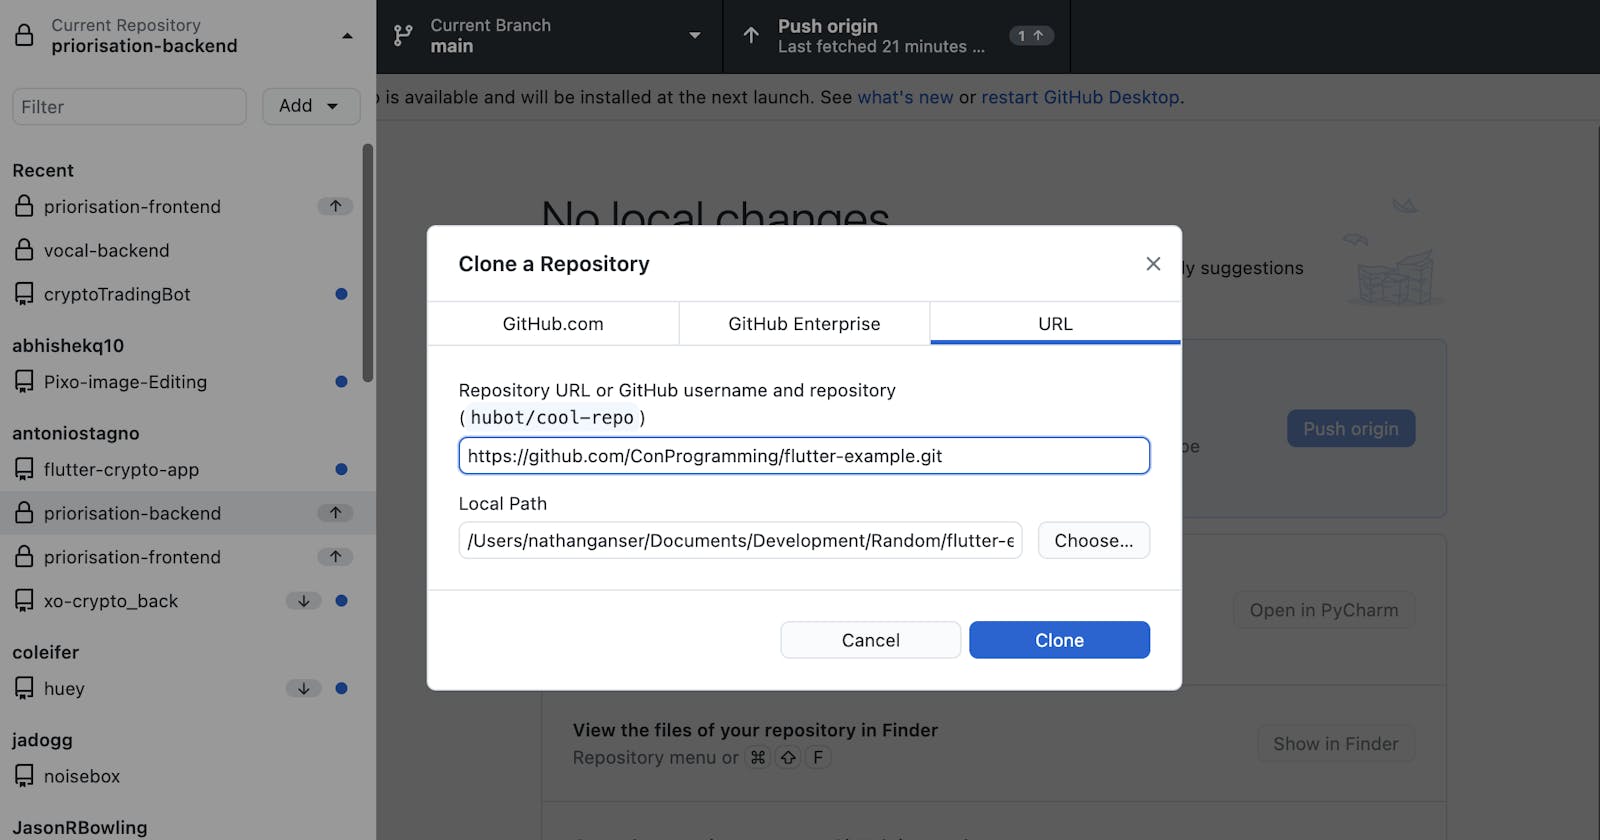
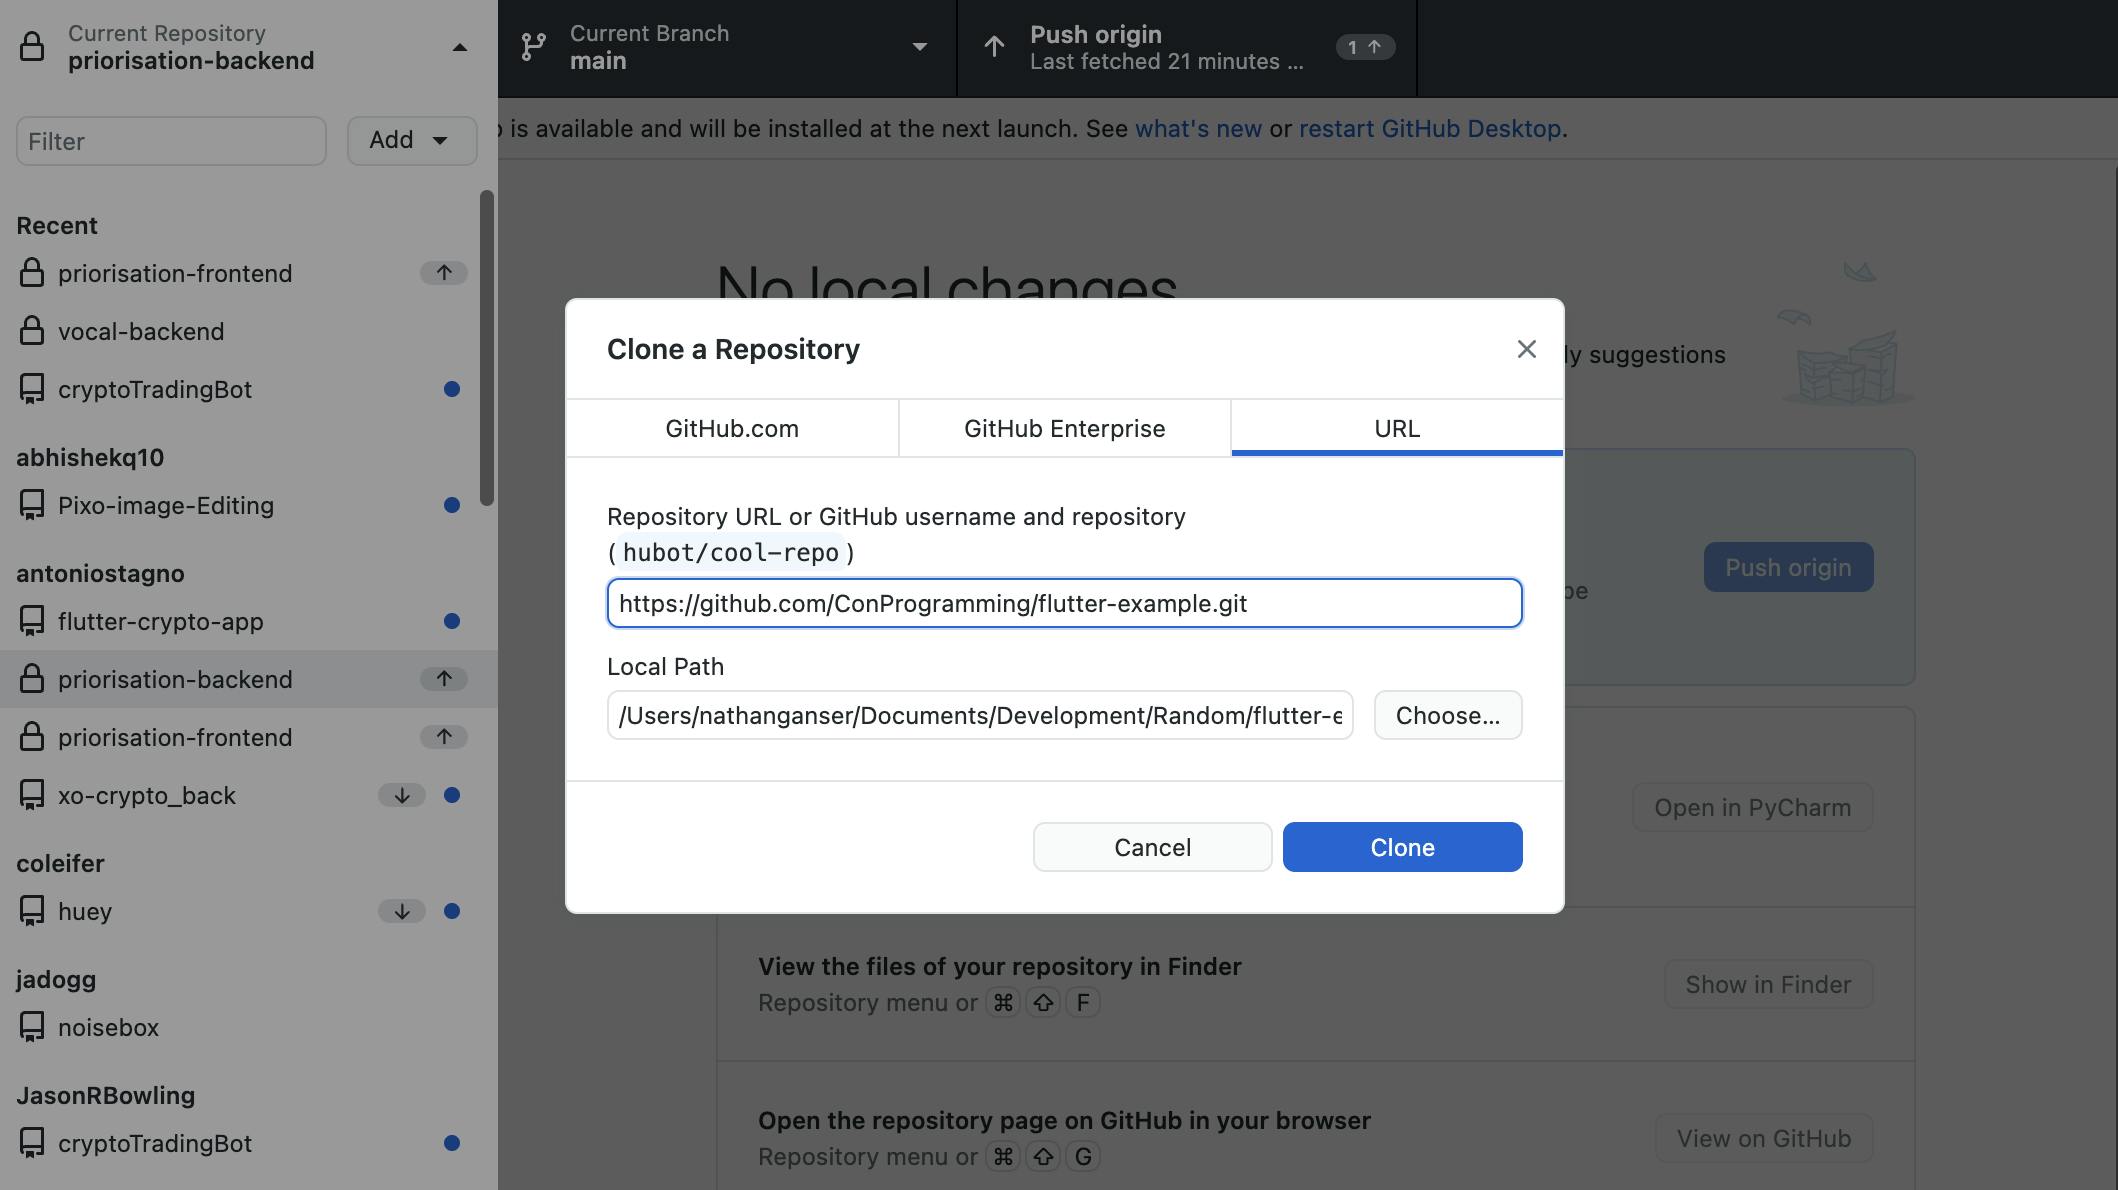
Or using the Github Desktop app, as seen below:
Open the project in Android Studio
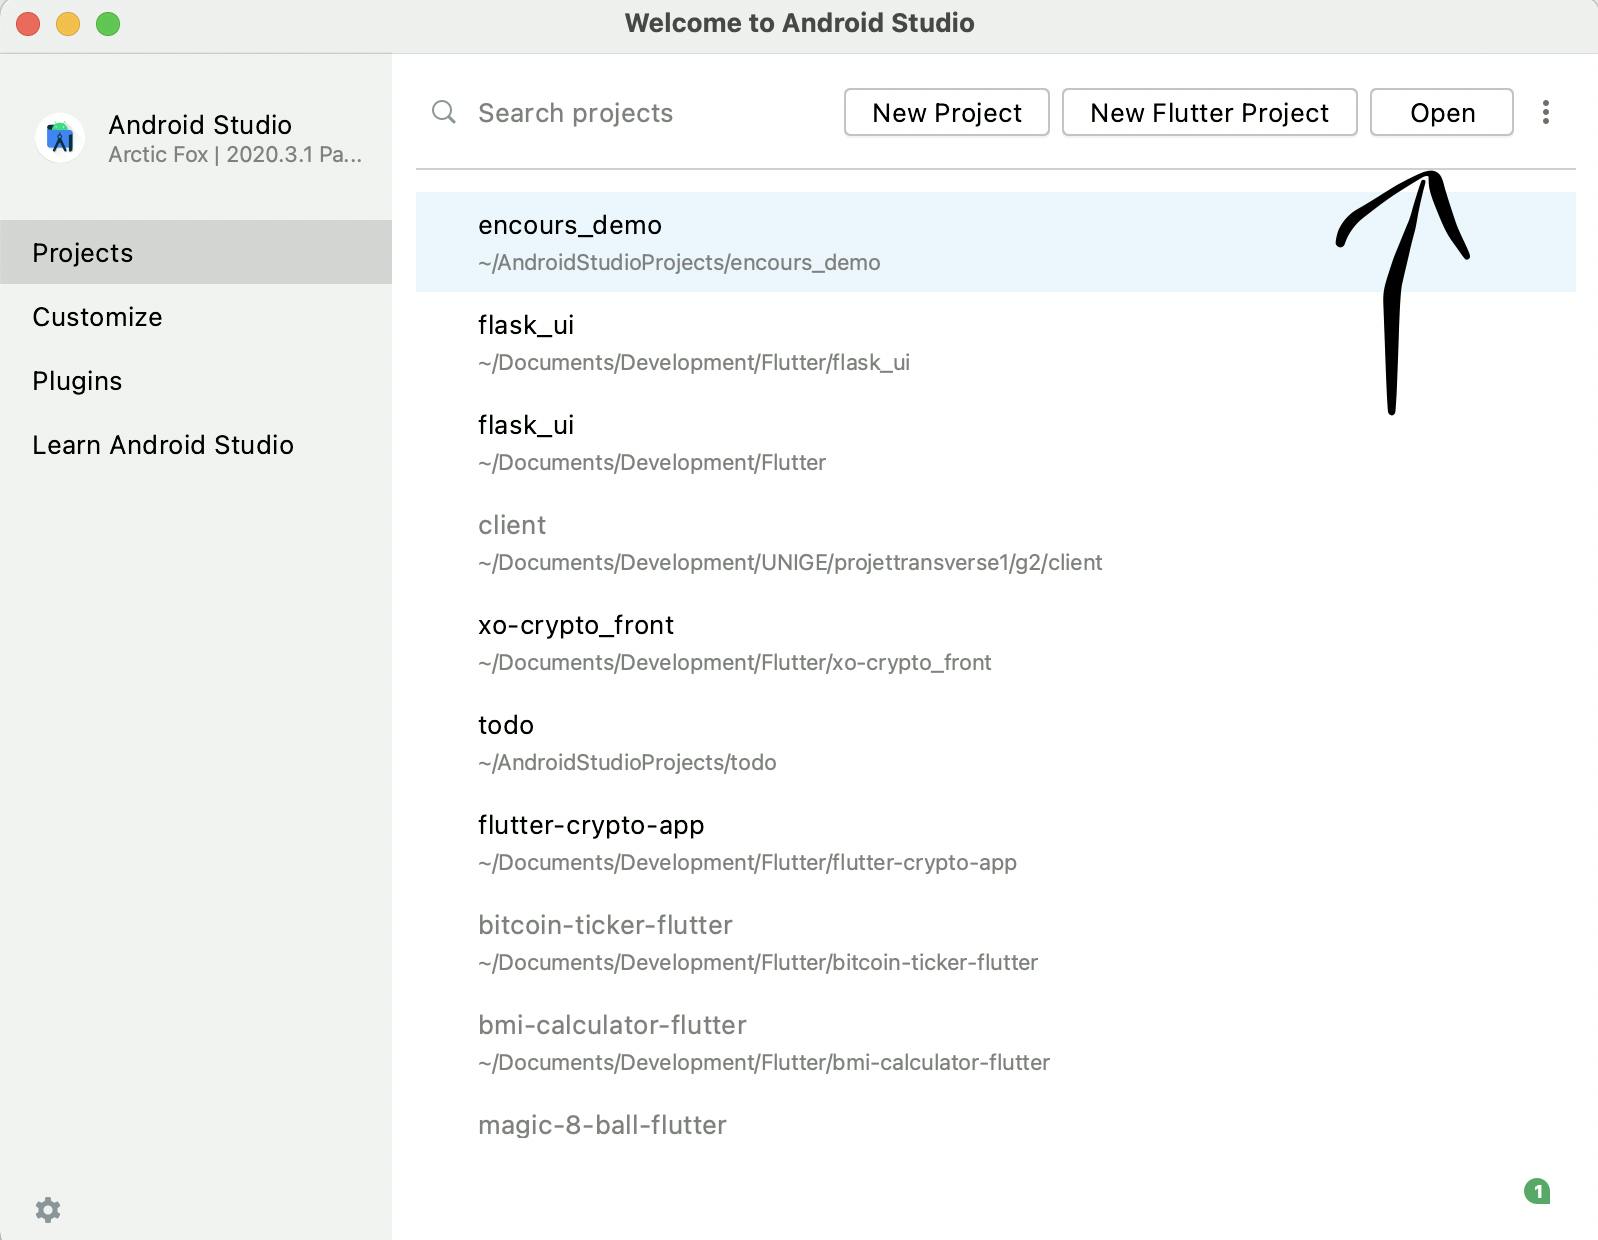
Next, select Open in Android studio and pick the repository you've just downloaded.
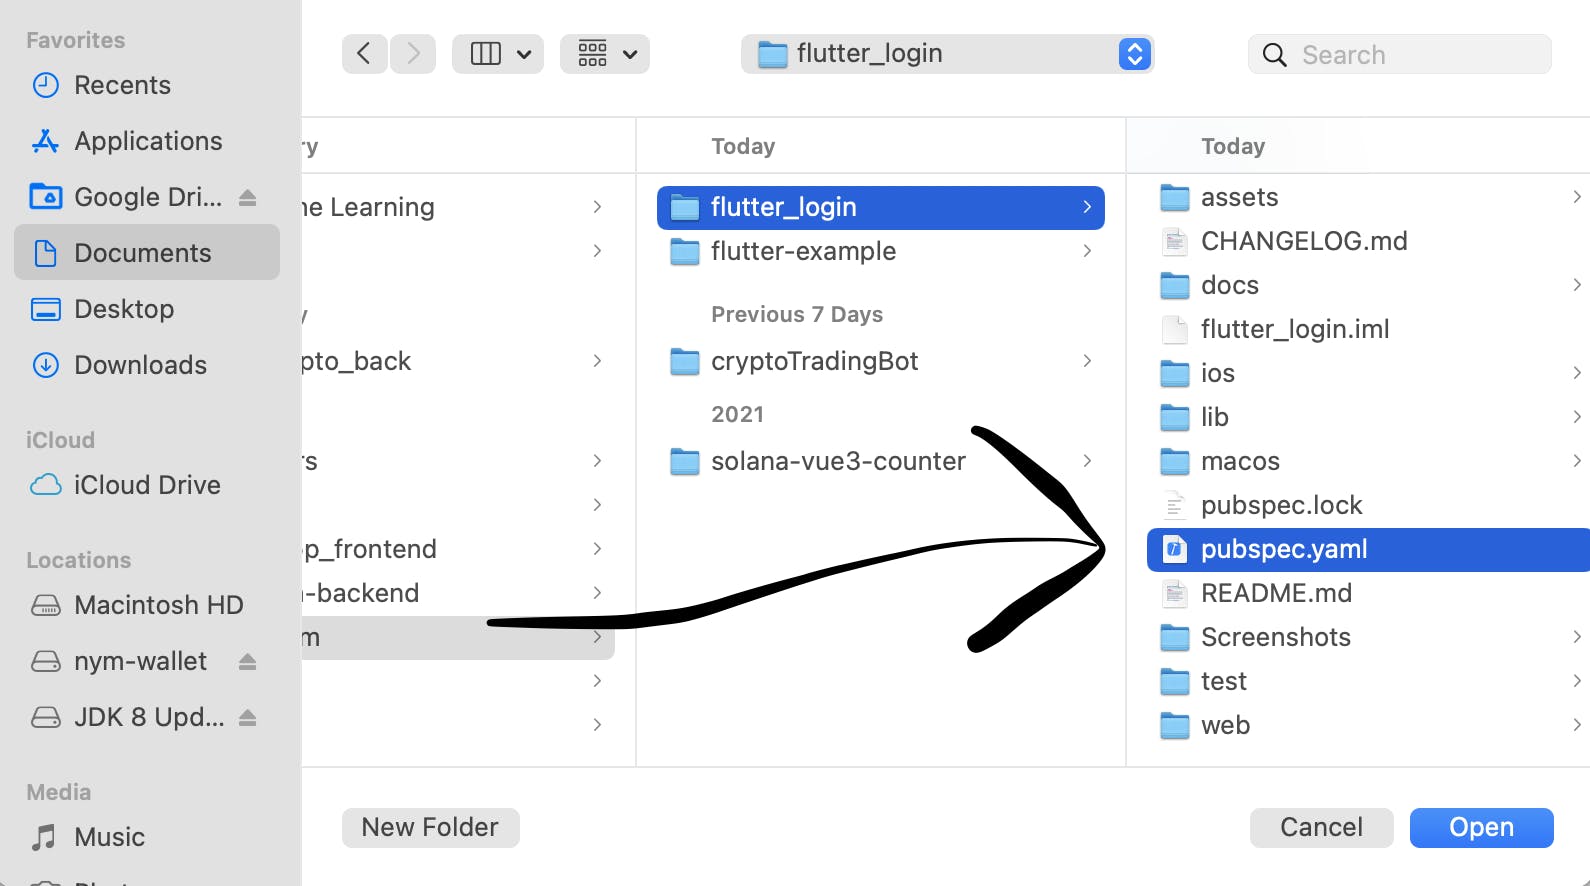
Make sure to select the folder that contains the pubspec.yaml file. This is the main configuration file that contains all the information Android Studio will need to automatically setup the project.
 So in the image above, the selected folder should be
 flutter_login
Setup the project in Android Studio
You will land on a page that will look something like that:
 Click on the
 main.dart button at the top and then on Edit configuration.
Next, click on the Fix button on the page you just opened:

Then, switch from the Dart to Flutter menu on the left, and choose the Flutter version you have installed on your computer.
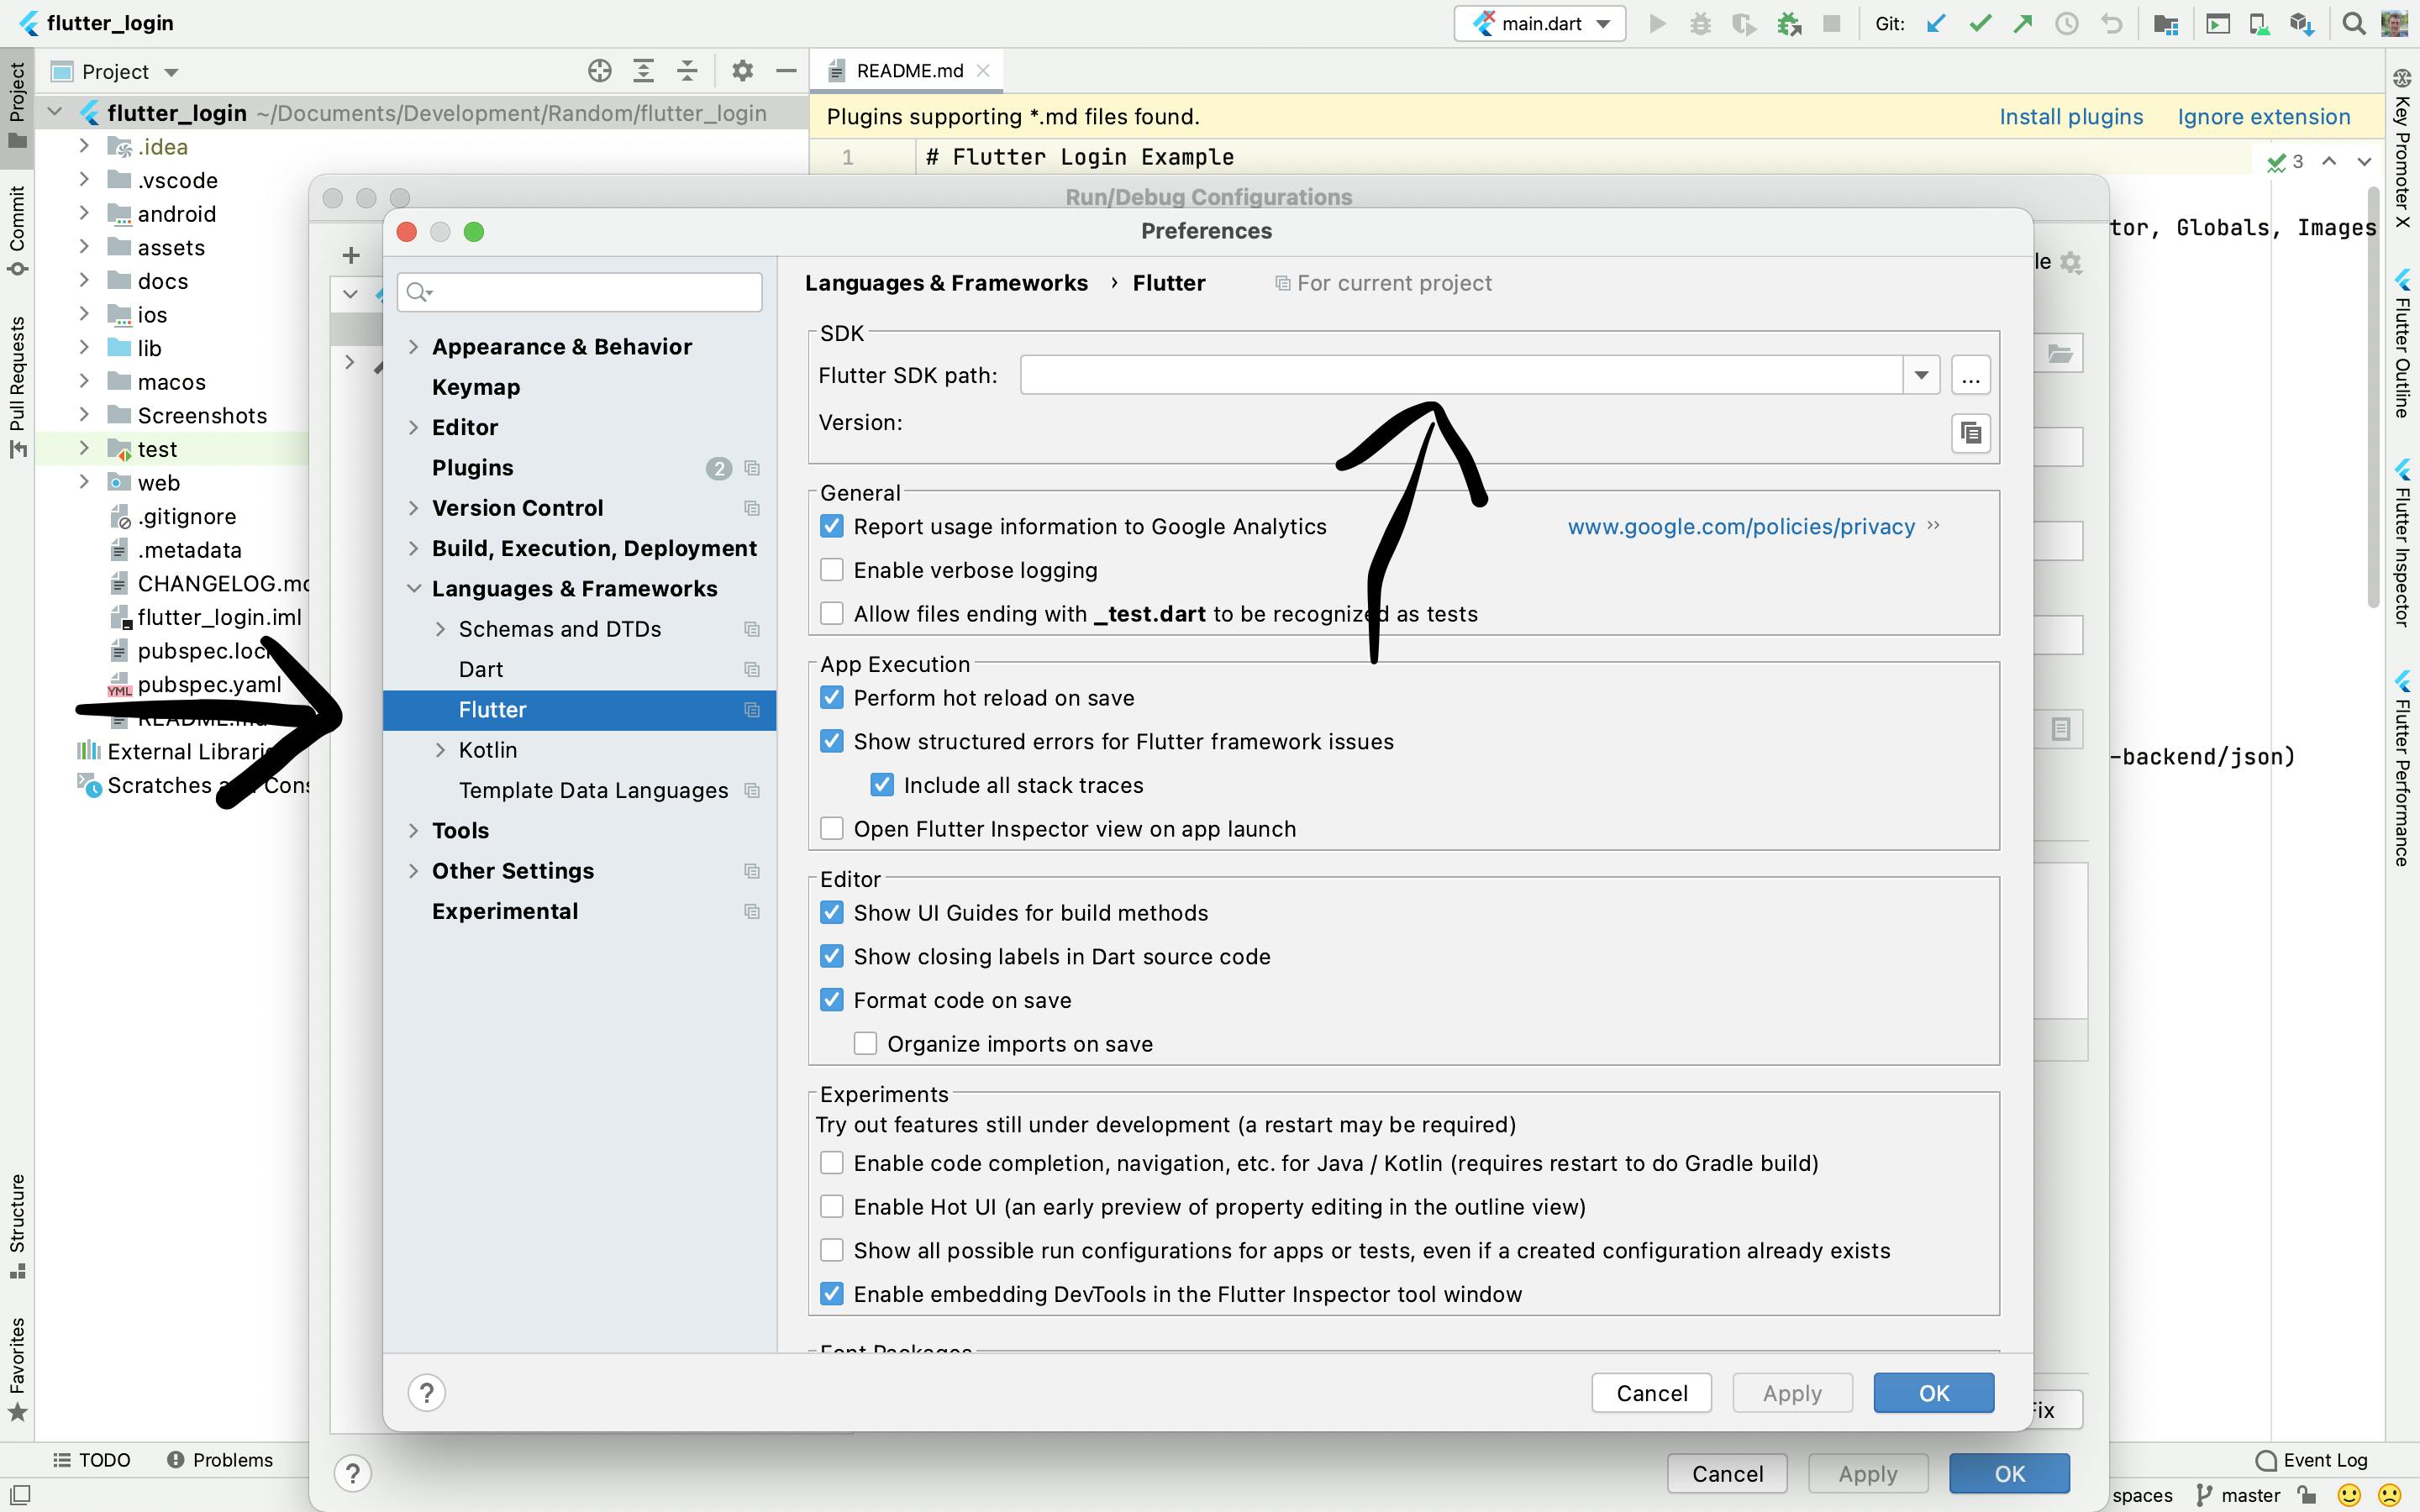
Finally, click OK & OK again on the bottom right of the pop up pages that have been opened to save your settings.
Install dependencies and run the app
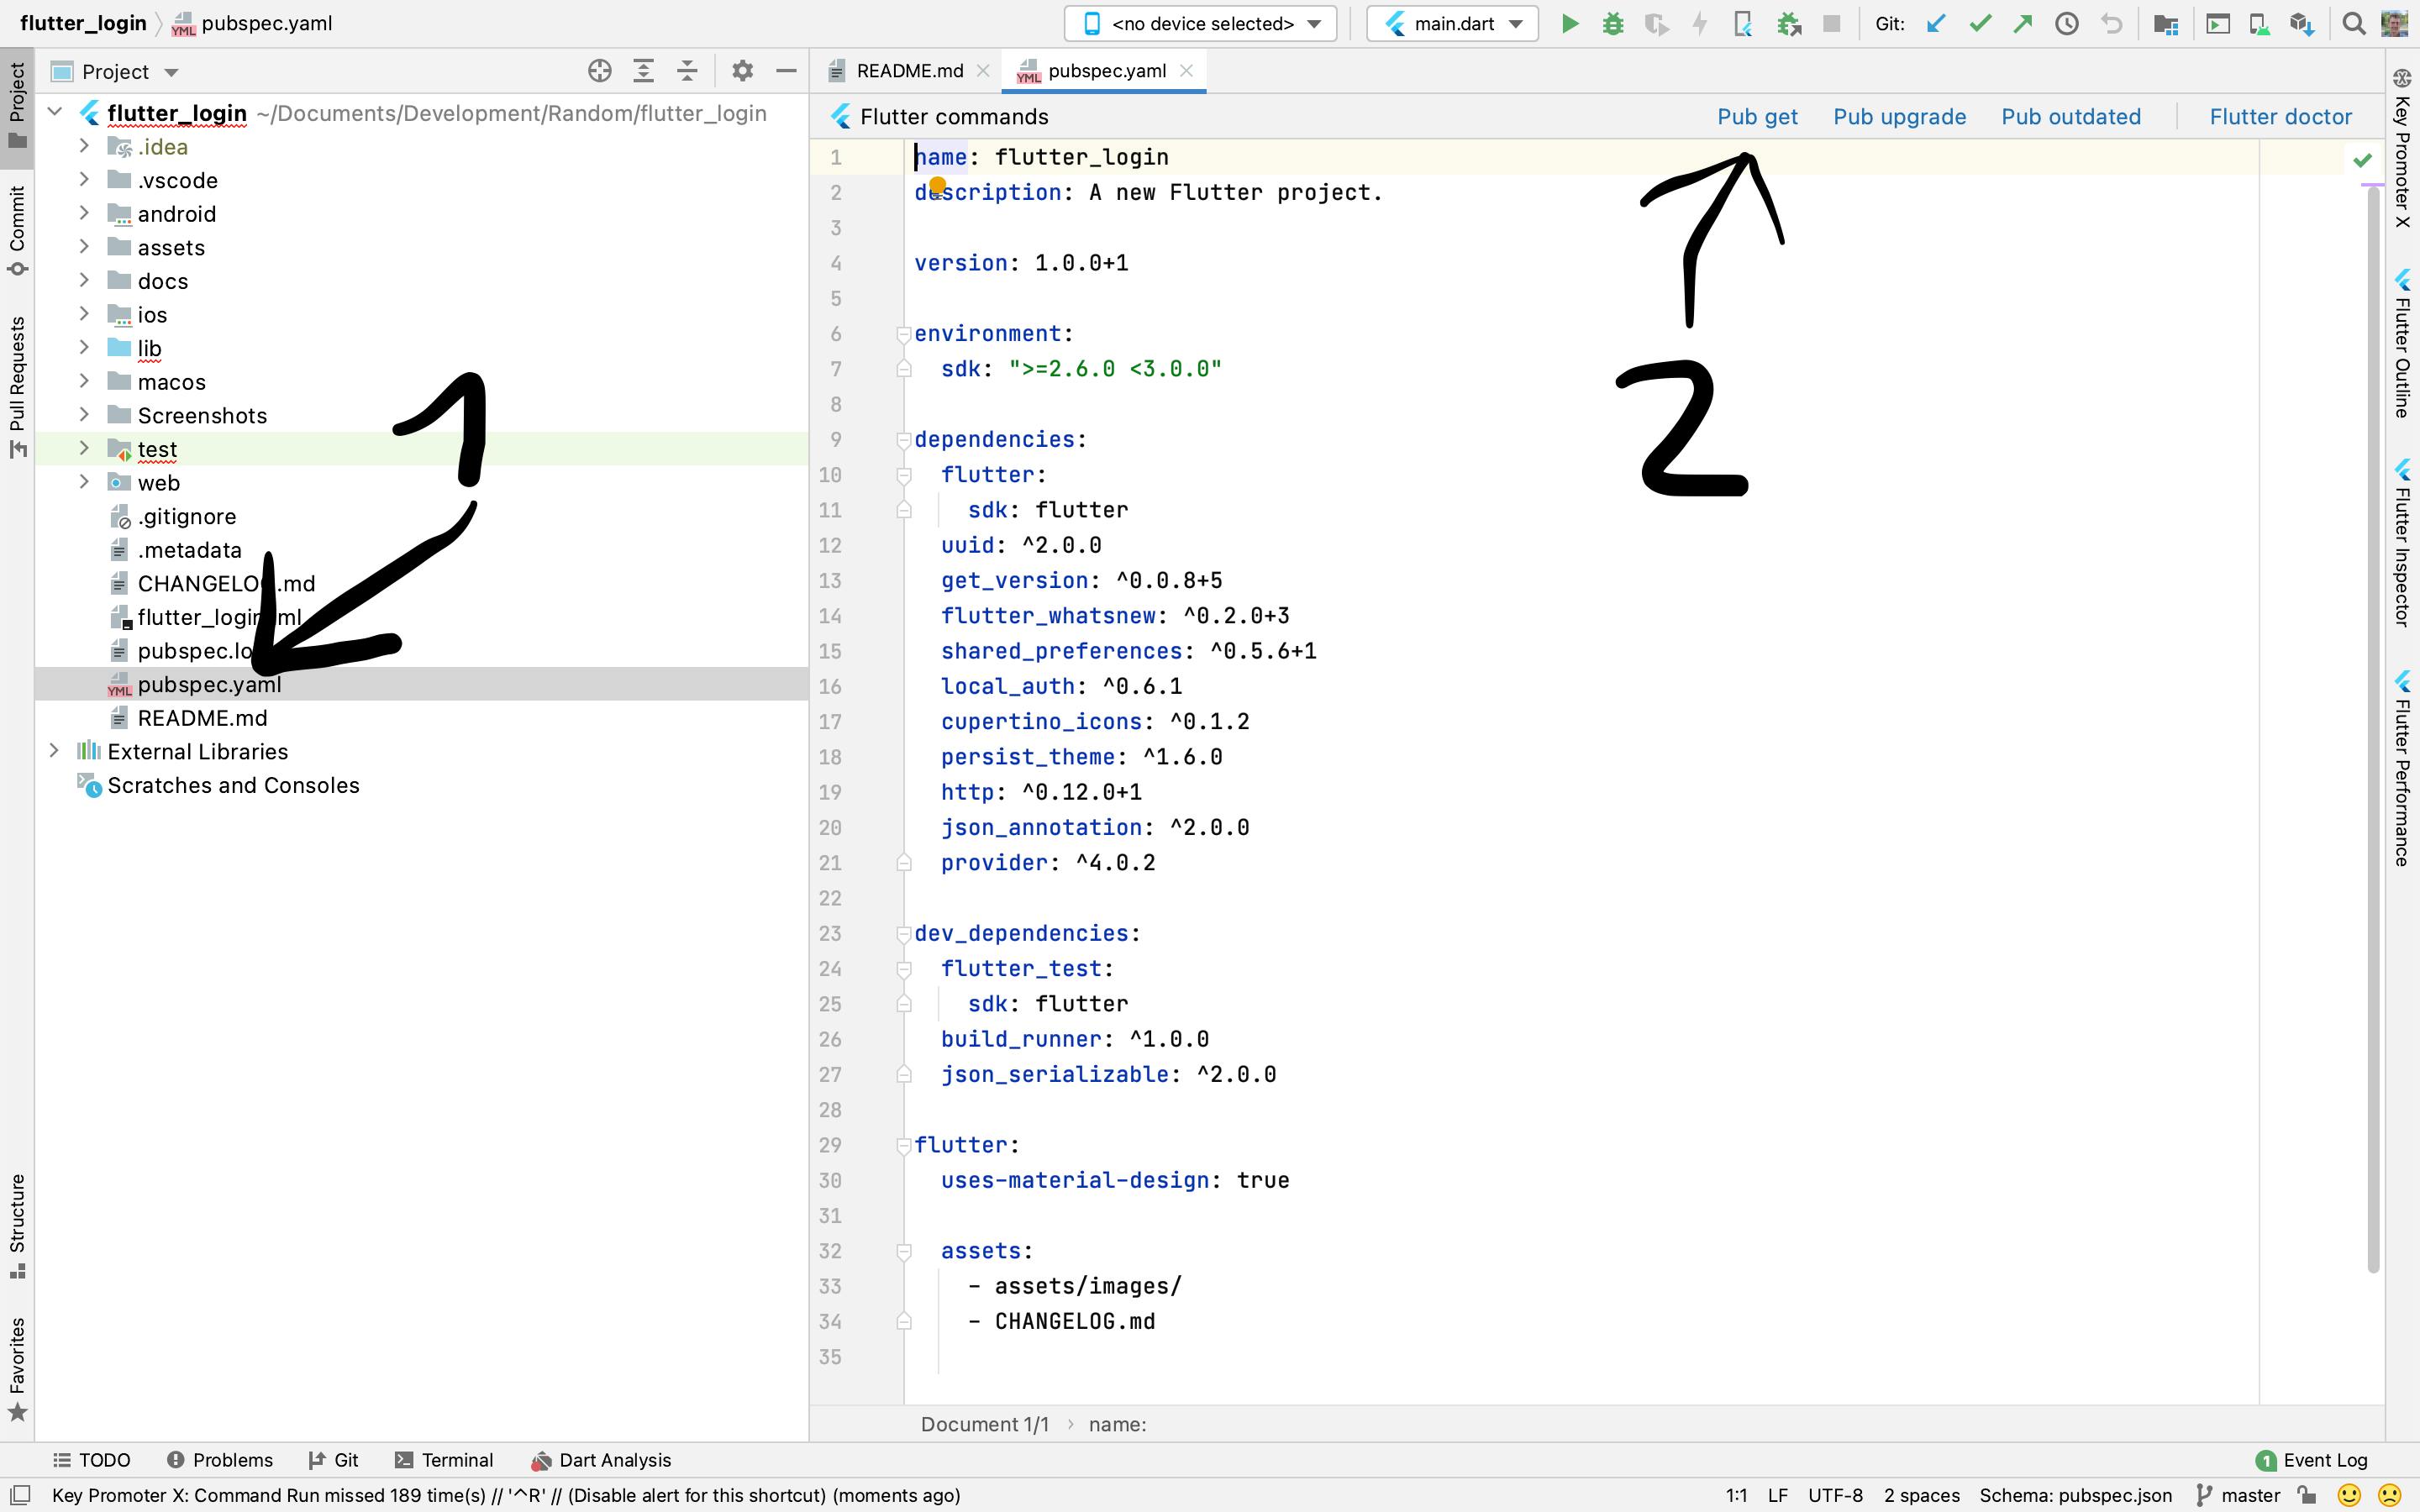
You're done! The play button should now be green! Now there is only one step left, installing the dependencies. For this, visit the pubspec.yaml file and hit the Pub get button.
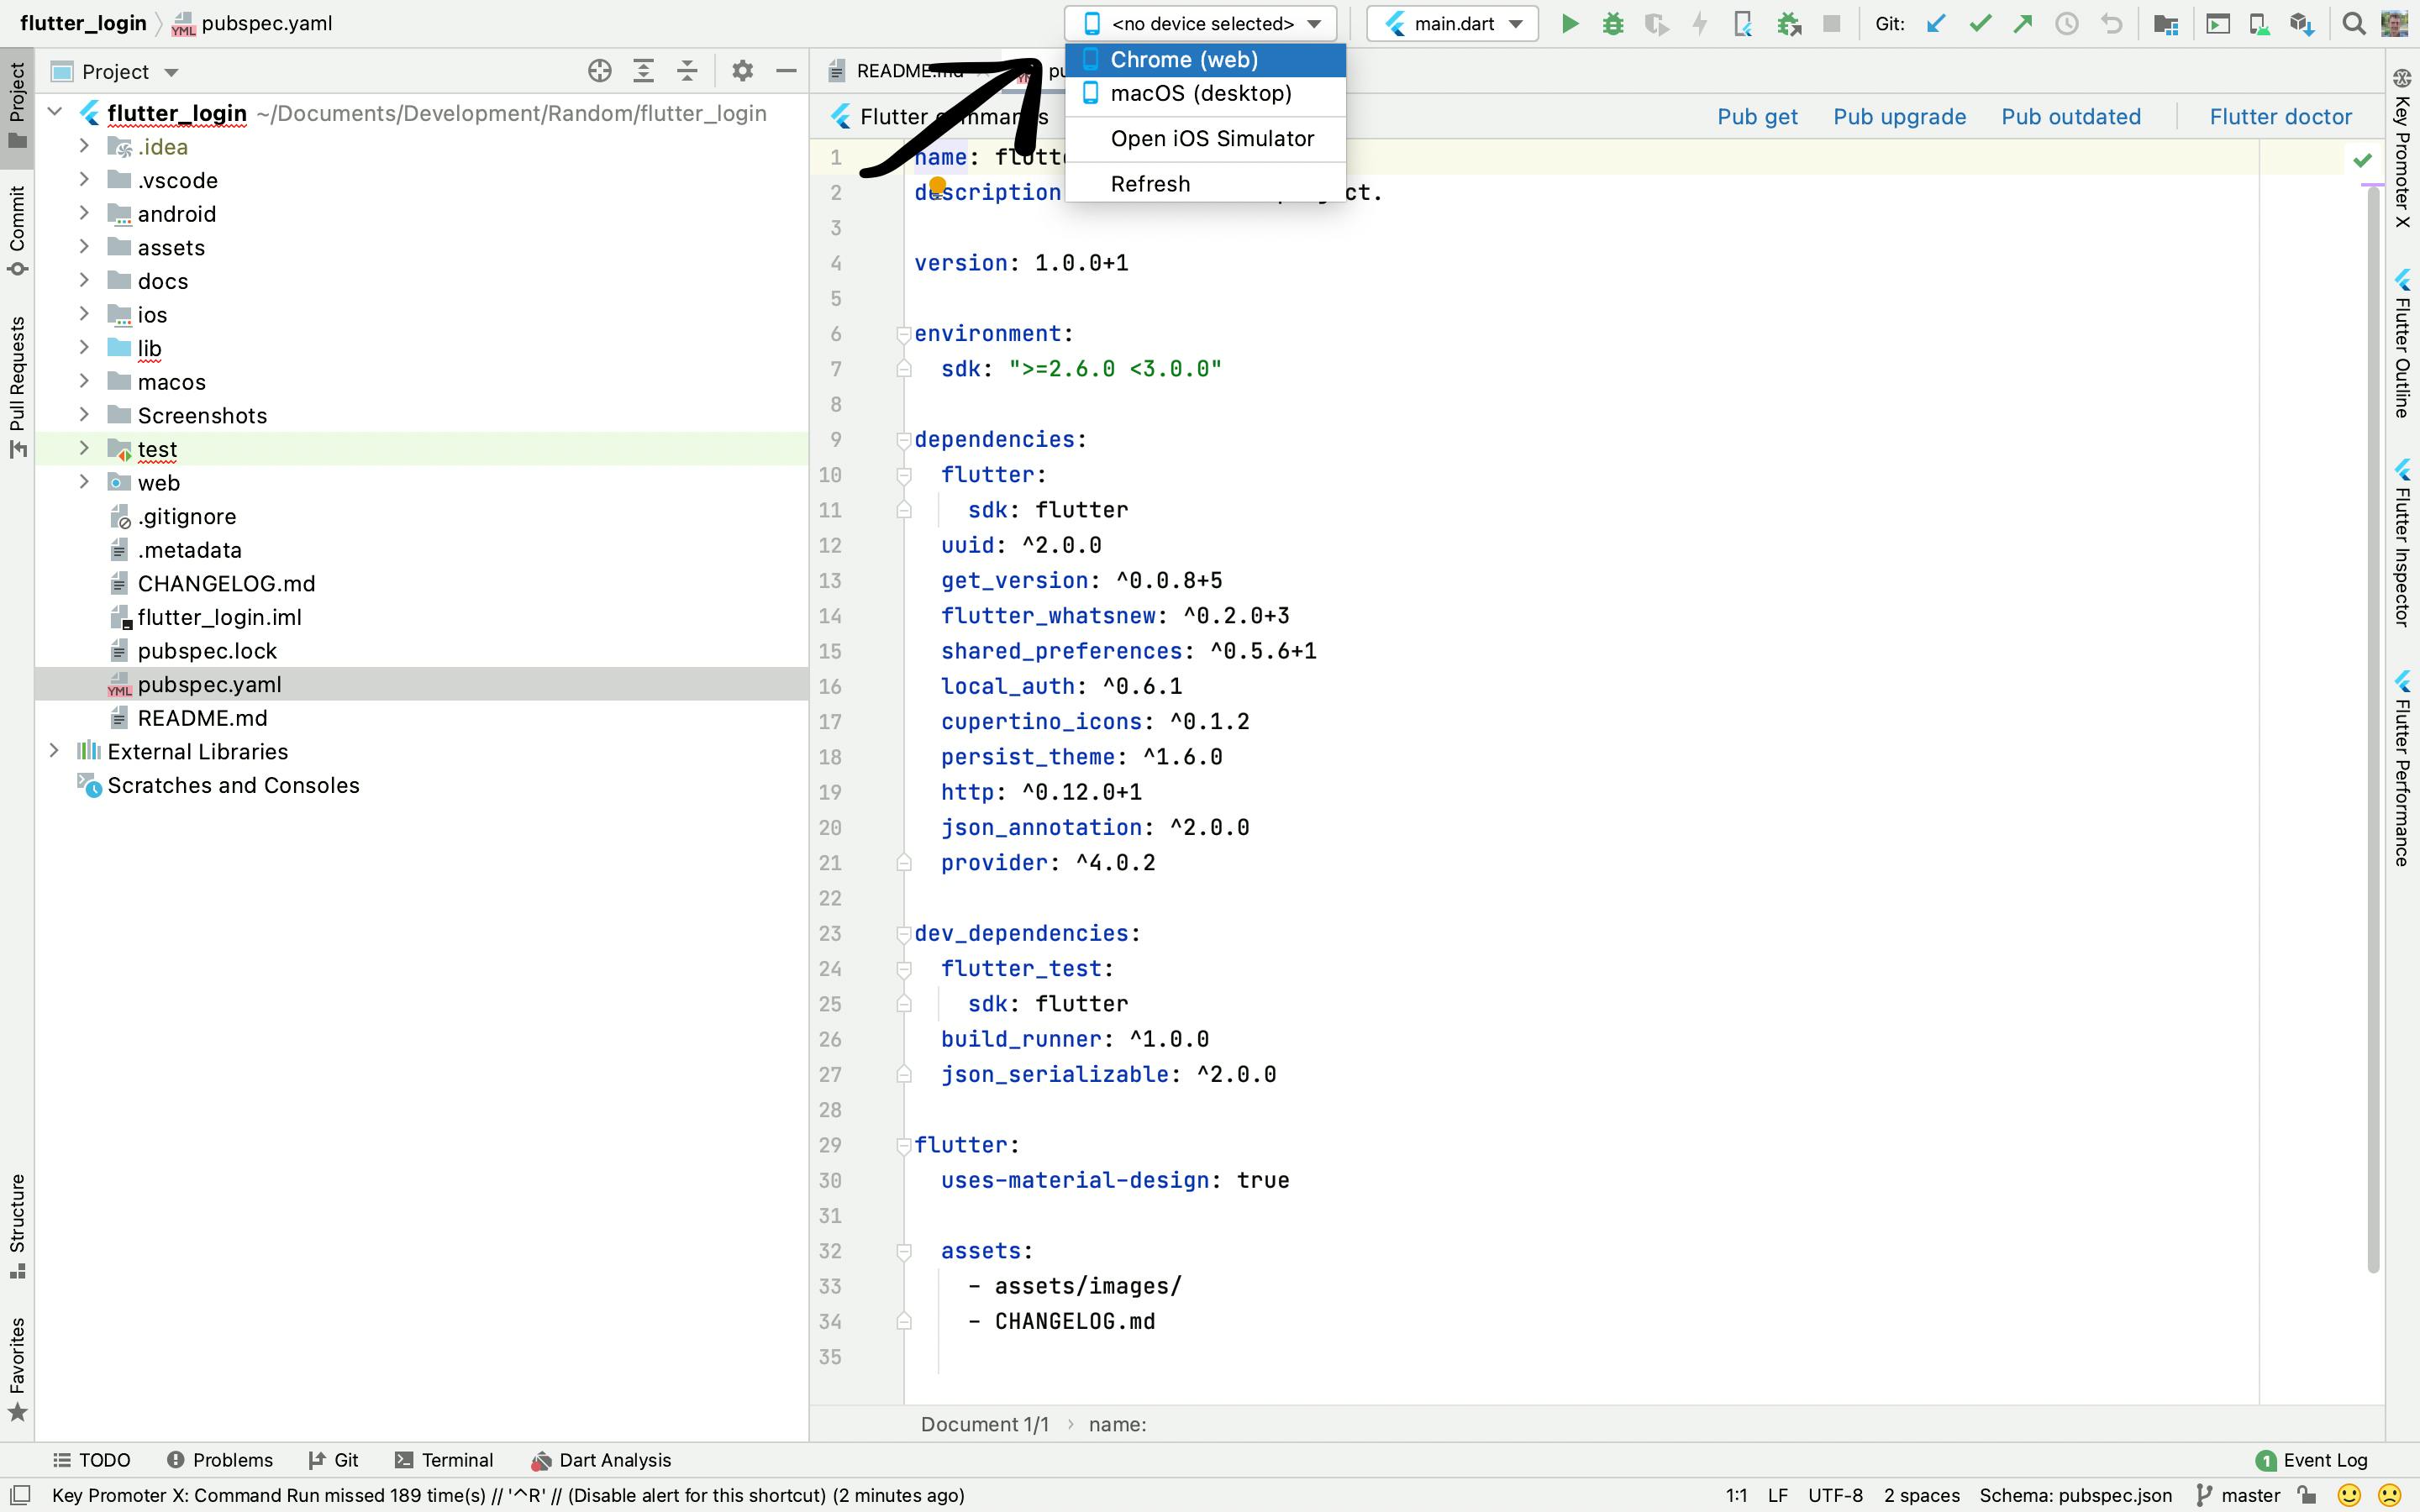
Once that's done, just select a device to run the app on (Chrome (web) is probably the easiest to get started) and hit that green play button!
Nice work!